20, June 2022
Celebrate the Solstice with Cyanotype
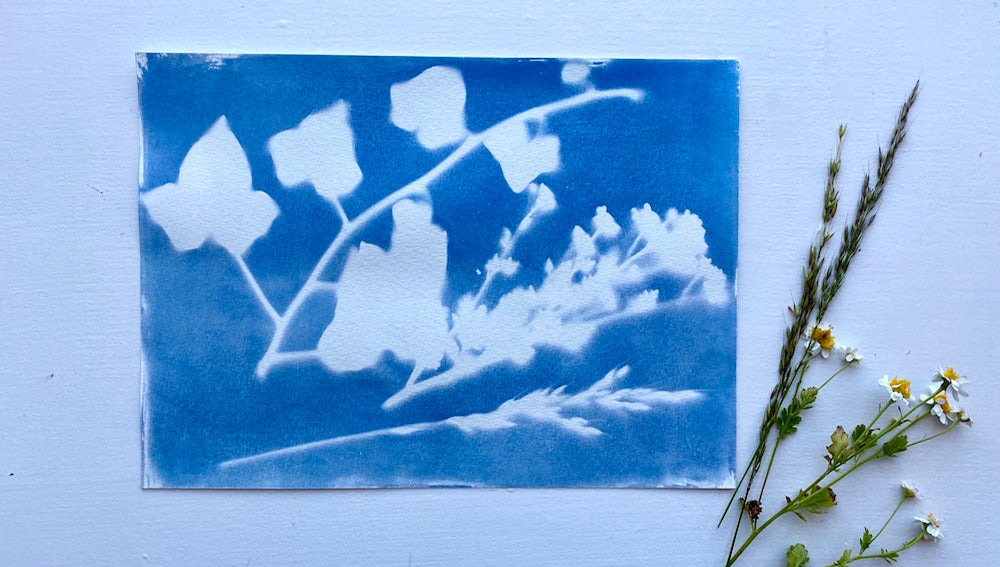
The summer solstice is here again and all around the northern hemisphere age-old celebrations like bonfires, feasts and festivals are underway, but there are quieter ways to revel in the daylight hours. A walk in nature, a picnic in the park... or an afternoon creating cyanotype prints.
Today, on the longest, lightest day of the year, we think it's the perfect way to harness the power of the sun. Ready to get creative? Learn how to make your own cyanotype prints with our step-by-step guide.
CYANO-WHAT?
Otherwise known as ‘sun prints’, cyanotype is one of the earliest forms of photography – the process was discovered way back in 1842. Known for its distinctive blue hue, cyanotype was used to reproduce anything from photographic negatives, maps and plans (does the term blueprint ring a bell?) to foraged botanicals and biological specimens.
The process is simple – all it involves is exposing a sensitised surface - usually paper or fabric - to UV light, which then creates an impression (or photogram) of your subject. Magic!
WHAT YOU’LL NEED
- Cyanotype solution (we used the pre-made Jacquard set)
- Jar
- Paper
- Brush
- Botanicals – we gathered some leaves and wild flowers
- Panel of glass (use one from a frame!)
- Water
- Gloves

MIX YOUR SOLUTION
Pop your gloves on and in your jar combine equal measures of solution part A and B. Only mix as much as you’re going to use, as the combined solution will be effective for just a couple of hours. Don’t worry, your unmixed bottles of solution can be stored in a dark place for later use.APPLY TO THE SURFACE
Do this part away from natural light. Using a brush or sponge, apply an even layer of the solution to your surface and leave it to dry in a dark place.Pssst! Be sure to protect your clothes and your workspace as the solution might stain.

ARRANGE YOUR OBJECTS
Once your surface is dry, lay out your foraged findings on top. Find a bright spot to place your soon to be print, and keep it secure by placing a panel of glass on top. Leave your print for 3-30 minutes – depending on how sunny it is!
RINSE YOUR PRINT
This is the fun bit. As soon as you submerge your exposed print in water, the colour will start to change to a beautiful shade of blue (ooooh). Leave them in a tray of cold, ideally distilled, water for around 5 minutes. Then, over the next 24 hours, the colour of your print will deepen and intensify thanks to oxidation. We told you it was magical.

